Monday, September 27, 2010

My Scrapbooking Area - Updated

I apologize for how these next pictures uploaded. I know it cuts my wording off funny on the side but there's no easy fix other than uploading them all again.


My Scrapbooking area.


Opposite side.


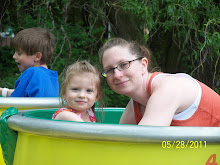
From the front. That's my daughter making an appearance.


How I store my scrap paper.


They are in the folders individually by color.


These 2 bins hold paper punches and Trimmers.


Some of my Stampin Up! punches


Some of my Martha Stewart punches.


2 black bins hold loose paper, vellum and trasparencies.


Ribbon Holder I made. Every so often I have to alter it when I get more ribbon. I just altered it this weekend so that there was room for boat loads more ribbon! Underneath is where I store my embossing powders (I store them in the rectangular plastic baby food containers!).


This area holds stamps, inks, Tim Holtz stuff, Cuttlebug folders and dies, markers and prisma pencils, envelopes, bling etc.

Out of the picture above is where I store my stickles, sizzix, bind it all, sewing machine, magazines etc.


2 large white towers hold Paper Packs, Copics, Albums and other misc. items.


All my cards safe in their plastic sleeves! I have so many yet I won't send them out cause I'm afriad the recipients won't appreciate all the work that went into them so here they sit tucked away safely.


Extra adhesives and refills


My Red ATG is Acid Free for my scrapbooks and my Pink ATG is for my cards!

Double layout


I've been making so many cards this year I haven't had much time to scrapbook and am so backed up! I did this double page quick layout this past week. Nothing fancy but wanted to get something done. I have to get back into my scrapbooking. I've spent so much time making cards that I've forgotten how to scrapbook, I know that sounds funny but it's so true!

Lots of cards!


Here are all the cards I'm about to show you!

File Folder Card using Bleach


This is probably one of my favorite cards. When I started I didn't know where I was going with it. I found the flower stamp in the $1 bin at Joannes. I knew that it would be perfect for stamping with bleach so when I got home I prepared everything and stamped the image multiple times on yellow cardstock just playing with it. I loved it! So then I stamped and embossed the image in black on the same color card stock and this time I took my blender pen and brushed the bleach over the open area in the flower. Loved it again! So now I had these 2 images and wanted to use them so I started putting things together and ended up making a file folder card! I sewed around the edges on the front to hold my background paper in place. I popped up the main flower and added a little brown ribbon. For the inside piece I stamped the image in brown and again sewed around the edges to mimic the front. I also distressed and scuffed the edges of the main layer of cardstock. I then took the stamp again and created the envelope so that it would match the card. I so love the way this card turned out!!!!!

Thinking of You


Masked off a circle on front of card and used SU! Ink for the moon, inked a little orange around the edges too. Then added some iridescent medium to make is shine. I stamped the main image in black ink added the sentiment and called it a day. Simple but so very pretty!

Top Note Die


For this I used random patterened paper I had left over. I adhered it to a peice of cardstock then ran it through my sizzix using the Top Note die from SU!. Added patterned paper to the edge and used a scalloped border punch. The letters are just fabric stickers I had lying around.

Using negative image


For this card I used what was left from the previous card after using the Top Note Die cut form SU! I added a fabric flower from Basic Grey, used ribbon that I knotted for the stem and the leaves are canvas that I painted green with a paint dabber and then ran through my crimper! I didn't want the negative cut to go to waste cause it was so pretty!

Embossed and Distressed


I embossed my main image and then went over the entire piece with broken china distress ink. I went over the edges with vintage photo distress ink and stamped my sentiment. Simple and quick card!

Best Wishes


For this card I just stamped a with a floral background stamp. I colored what I wanted with my glaze pens. I then stamped the image on another piece over a sentiment that I stamped first (I just masked it before I restamped the background) and cut out just a portion of the image, dolled it up a bit and then popped it up over the original stamped image on my main card.

Pumpkin Card


Pumpkin Card! I used my crimper to crimp my paper diagonally from the corners. Saw this originally on Spilt Coast Stampers site but changed it up just a bit. My pumpkin is made from 3 ovals - the center oval popped up - and all three peices are flocked. Used Ribbon for the stem and a little green wire for the leaves.

Welcome Baby


My niece is having a little girl in December so I made this card for when she's born. The giraffe is from Create a Critter Cricut Cart. I fanfolded a piece of cardstock and added the sentiment on top. Ribbon is from SU!

Potted Flower card


Used SU! markers to color the image in then stamped it. I added a little iridescent medium to the flowers and pot for added sparkle. Inked the edges and tore the inside card layer for a more rough look.

Quilted Card


Scraplifted this idea from the Cricut Messageboard! It's more complicated than it looks :LOL:. Cut all the squares out and then some were cut even smaller for more interesting look. It's took quite some time to put it all together.

Thinking of You Crossword


For this I embossed a crossword background stamp and then finished it off with some alphabet stickers I had lying around. Nothing Fancy but I been wanting to use that stamp.

Stampin Up! Aviary Set


Just a quick card using a stamp set from Stampin Up! I just got. The sentiment is from the Be Yourself set from Close to my Heart.

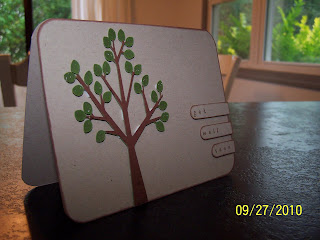
Get Well Soon


I can't remember what Cricut Cartridge the tree is cut from as I cut is about a year ago and just set it aside. I finally did something with it:) Tree is poped up and I added a little sparkle from a glitter pen.
I'm going to try to update my site today. My daughters been sick and then I woke up with it this morning and I'm sure my boys will have it by weeks end. Tis The Season, I suppose.

I have lots of new cards that I have to get posted and will try my best to get it done today.

Wednesday, September 1, 2010

Wish you were here Card


Using $1 stamps from Michaels I created this fun card. The envelope was stamped 3 times and layed for dimension.

Embossed Cards


For the first card I used all stamps made by Wendy Vecchi. I stamped and embossed the flower and swirls and then pop dotted them up. I stitched on a piece of ribbon then gathered it and adhered it to the card.

The second card was stamped and embossed using an embossing powder that appears distressed. I love it!

On the third card I used a CTMH stamp set stamping all the girls but one is black then embossing over them with clear. The sentiment is a stamp from the $1 bin at Michaels.

LinkWithin

Related Posts with Thumbnails