Someone on the Cricut mb posted this type of card they made after seeing it on the
Splitcoaststampers website. I loved the card but didn't want to have to figure out the lines for the window everytime I wanted to make the card so I decided to make a .scut file for it. There is a page for scoring and for that I simply turned my cricut blade itself upside down in the housing and it scored the lines perfectly. I then used a .cut file from Okieladybug's blog for the
Gusset Envelope so that the card would be protected. The card itself is a square 4.75 in. card and the envelope was cut at 5in. Below is a quick tutorial on how I put mine together. If you have any questions feel free to contact me.
If you'd like this SCAL file please leave a comment with an email address that you'd like the file sent to. - Thank you
------------------------------------------------------------------------------

Recessed Window Card and Gusset Envelope
---------------------------------------------------

After file is cut this is what it should look like
---------------------------------------------

Open to the inside and fold on score lines closest to the inside of window
----------------------------------------------------

Fold triangle areas inward now so it looks like above (this is a view from the inside of the card)
---------------------------------------------------------------

Card closed after scoring
-----------------------------

All my layers cut out
---------------------------

Put Adhesive on triangle area where the front layer will go
-------------------------

Front layers added inside of window frame
-------------------------------------

Inside of card (back of recessed window)
---------------------------------

Layers added on top of inside piece to make it look nicer
-------------------------------------------

3 ovals punched out using SU! large oval punch
2 adhered together to form base of pumpkin
-----------------------------------------
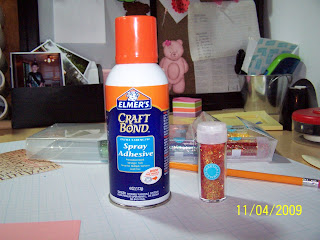
Sprayed with Elmers spray adhesive and then sprinkled with Martha Stewarts Tinsel Glitter
----------------------------------------------------------

Pat down with your finger and then allow to dry completely then shake off the excess
---------------------------------------------------

Ribbon for stem added
Green wire twisted for accents
Then used pop dots to adhere final layer of the pumpkin
------------------------------------------------------------

Pumpkin placed in recessed window along with wrapped hemp twine
----------------------------------------------------------------

Front frame stamped with brown and green ink
Celebrate Fall sentiment embossed also
---------------------------------

Full inside of card
-----------------------------------

Top inside of card
Stamped in brown with inked green edges
Edges of paper also inked in green
----------------------------------------

Front of card
-----------------------------------

Side view of card
----------------------------------

Side view of card
-------------------------------

Card and back of Gusset Envelope
------------------------------------

Card and Gusset Envelope
-------------------------------

Front of Gusset Envelope
----------------------------------------------

Card inside of the Gusset Envelope
------------------------------------------


 Recessed Window Card and Gusset Envelope
 After file is cut this is what it should look like
 Open to the inside and fold on score lines closest to the inside of window
 Fold triangle areas inward now so it looks like above (this is a view from the inside of the card)
 Card closed after scoring
 All my layers cut out
 Put Adhesive on triangle area where the front layer will go
 Front layers added inside of window frame
 Inside of card (back of recessed window)
 Layers added on top of inside piece to make it look nicer
 3 ovals punched out using SU! large oval punch
 Sprayed with Elmers spray adhesive and then sprinkled with Martha Stewarts Tinsel Glitter
 Ribbon for stem added
 Pumpkin placed in recessed window along with wrapped hemp twine
 Front frame stamped with brown and green ink
 Full inside of card
 Top inside of card
 Front of card
 Side view of card
 Side view of card
 Card and back of Gusset Envelope
 Card and Gusset Envelope
 Front of Gusset Envelope
 Card inside of the Gusset Envelope