Wednesday, June 30, 2010

Creative Post for June 30th


This is my mini CD holder calendar. Used Designers Calendar and Doodlecharms. My mini calendars are usually pretty simple cause I make 2 of them each time, one for my computer desk and one for my scrapbooking desk.

Tuesday, June 29, 2010

Creative Post for June 29th


This is my July Calendar. I used Desiners Calendar and my cricut software to create a celander that resembles a flag color wise. I'm happy with the way it turned out! I used the preserves cart for the watermelon and used my scallop punch to create the bite mark in it. The lettering is all the designers calendar cart. I added some stitching around the word summer. The background paper is from Basic Greys new Manilla Basics pack.

Monday, June 28, 2010

Love the new embellishments I picked up


I love these cute embellishments I pick up at my LSS Utopia Stamp and Craft this weekend! They are make by American Crafts. I don't usually use stickers on my cards or layouts by I loved the sunflower in the thanksgiving pack and all the sparkly fruit too!

I work best in a mess


I work best when I have everything out om my table. And this isn't even a quarter of the mess it usually is! Usually there is no desktop to be seen at all!!!

More Pictures...


Inside my main bathroom there is this wonderful edge all the way around. I use this shelf to show off all the pieces of artwork my kids have made me over the years.

Just some pictures

My middle childs door. Used vinyl for this.


A painting my 2 oldest kids did for me a couple years ago. Just using a large canvas and paints.


This is the wall you see as you enter my bedroom. I used vinyl for the quote that is above and below the photos of my kids.


This is a small hanger made by Tim Holtz. I printed out a photo of my kids and attached it to an acrylic square. This is hanging in my main bathroom.

Creative Post for June 28th


The background of this card consists of patterned paper for the bottom half then I stamped the top half with a glitz distressing stamp in Tattered Rose distress ink. For the tag I used my blending tool to put on some Tattered Rose distress ink then dabbed over with my Pearl Paint Dabber. Added a flourish stamps embossed with clear powder (hard to see). Added ribbon and my sentiment and called it a day. Enjoy.

Creative post for June 27th


This card was scraplifted off ScrapTV. Great site with lots of ideas. Used nestibilities for main image. Stamped and colored image, cut with nestibilitie then used my SU! Iridescent Ice over the entire image. I then made a second image and cut out random flowers and sttached them to my main stamped image.

Creative Post for June 26th

If my oldest sister is looking right now close your eyes cause this is your birthday card :)


This is a gatefold card. Used SU! paper punches. The metal piece in the top left corner is actually a magnet that can come off and the right flap is perforated so that it can be used as a bookmark. Inked the edges of the patterned paper and added some ribbon and a bow.

Sunday, June 27, 2010

Creative posts will go up Monday

It's been a really busy weekend with graduation and birthday parties. I'll have all the creative posts for this weekend up at some point on Monday:)

Friday, June 25, 2010

Creative post for June 25th


This is a card I made for my sons birthday. I ran the top half of the card through my sizzix with a cuttlebug folder. Then I used a wheel from SU! for the bottom half. I dragged my versamark ink over the raised embossed area and used some clear embossing powser for a little something extra. The image is from Dustim Pike and I quikely colored him with my copics, added some glossy accents to the cherry and it's done.

Thursday, June 24, 2010

Creative post for June 24th


This is a slider card I made for a birthday party we are attending this weekend. I stamped the background with the new Hero Arts Grid stamp in versamark ink on the kraft cardstock. The inside is actually a pocket that can hold money or a giftcard. I used my nestibilities for the top layer. Covering the sentiment with Iridescent Ice from SU!. Added a little ribbon and it's done. I really like how it turned out!

Wednesday, June 23, 2010

Creative Post for June 23rd


Simple graduation card. Used my coluzzle to cut the circle. On paper underneath I stamps out the word congrats in the circular pattern. Popped up the main background paper and added some ribbon and stitching. Used my Clear Stardust pen on the letters for a little extra sparkle.

Tuesday, June 22, 2010

Creative Post for June 22nd


The original idea for this card came from Tresa Black over at Fabulously Artsy! The cut file for SCAL is in the post below.

For this card I used the new Lacy Labels Cricut Lite Cart. Inked a background on the Brown piece with versamark. Inked all the edges and added a border stamp - I love acrylic stamps cause you can bend them to fit just about any shape! I used Twill Ribbon from SU! and stamped on it with a sentiment stamp. Also added some shimmer with my Clear Stardust pen.

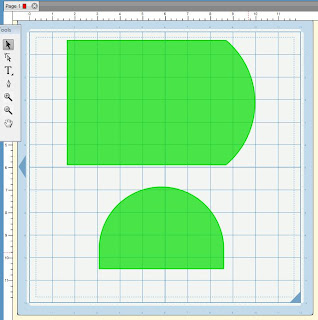
Round Card cut file for SCAL


Rounded Card shown above!

If you'd like this SCAL file please leave a comment with an email address that you'd like the file sent to. - Thank you

LinkWithin

Related Posts with Thumbnails